Back to Templates


Important: This workflow uses the Autype community node and requires a self-hosted n8n instance.
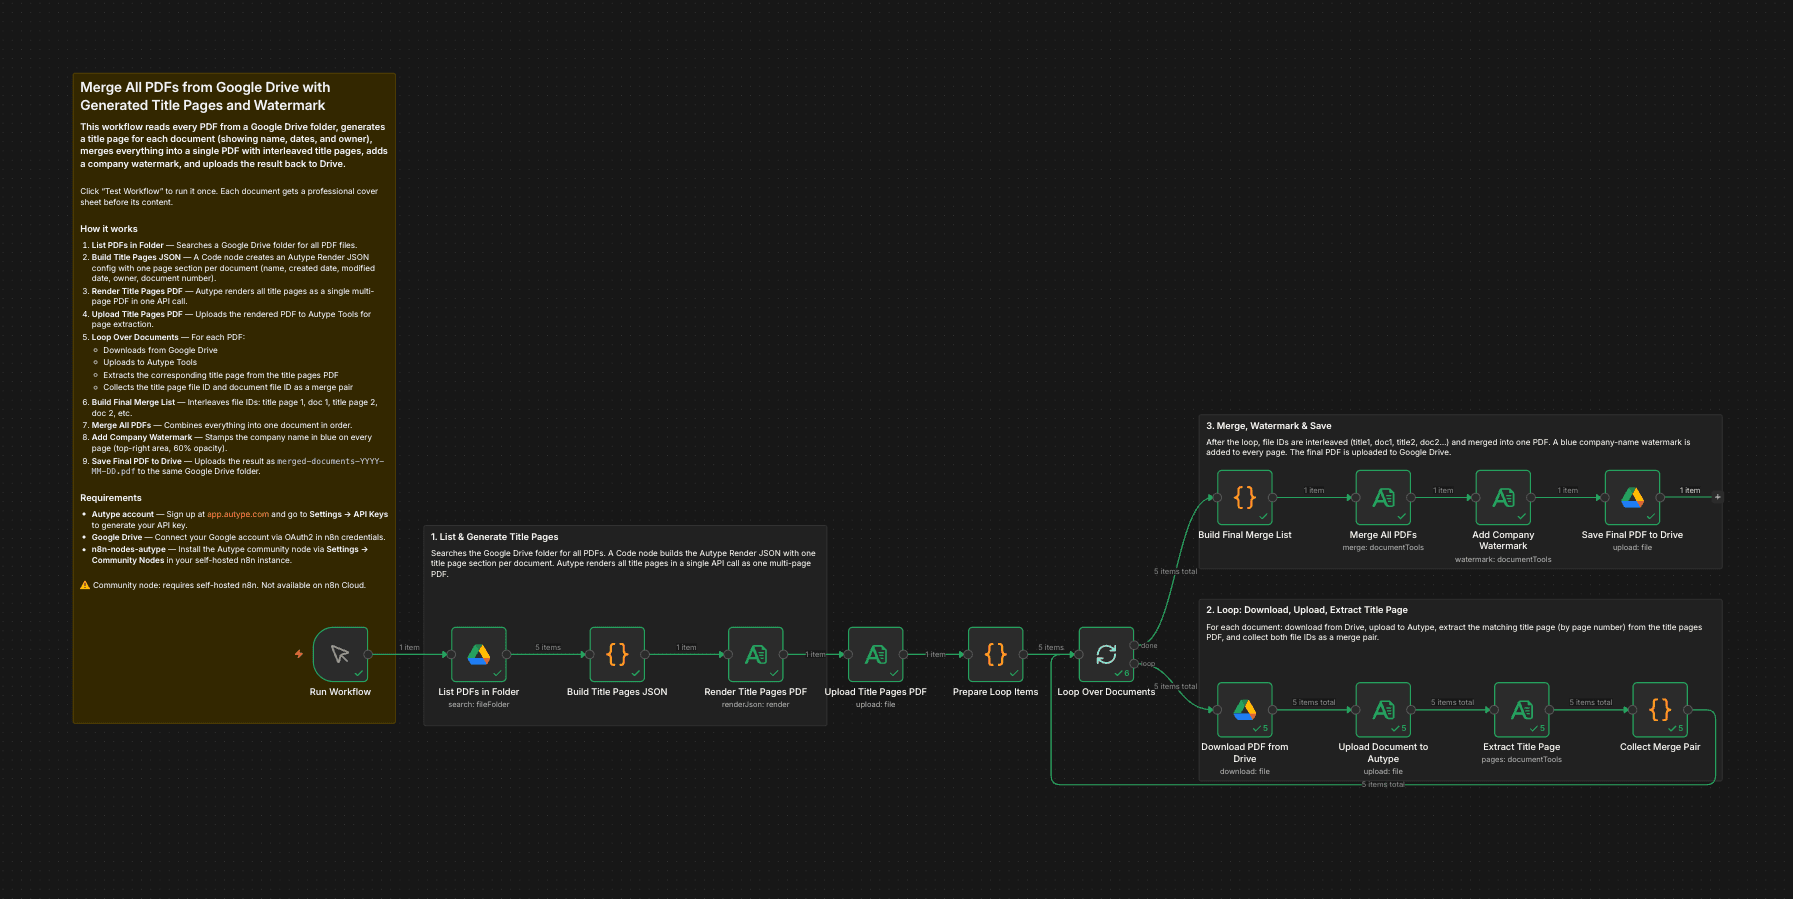
This workflow reads every PDF from a Google Drive folder, generates a metadata title page for each document (showing filename, creation date, last modified date, and owner), merges everything into a single PDF with interleaved title pages, adds a blue company-name watermark to every page, and uploads the final result back to Google Drive.
Who is this for?
Operations teams, project managers, legal departments, and anyone who needs to compile multiple PDFs into a single branded document package. Useful for monthly report bundles, compliance archives, client deliverables, audit documentation, or any scenario where multiple files need to be combined with clear separation between documents.
What this workflow does
On manual trigger, the workflow lists all PDFs in a specified Google Drive folder. It generates all metadata title pages at once using the Autype Render JSON endpoint (one API call for all cover sheets). Then it loops through each document, downloads it from Drive, uploads it to Autype, extracts the corresponding title page using the outputFileId directly (no re-upload needed), and collects merge pairs. After the loop, all file IDs are interleaved (title page 1, document 1, title page 2, document 2, ...) and merged. The watermark step also uses the outputFileId from Merge directly. The final PDF is saved back to Google Drive.
Output structure
The final merged PDF has the following page structure:

Every page in the merged result carries a blue company-name watermark.
How it works
- Run Workflow — Manual trigger starts the pipeline.
- List PDFs in Folder — A Google Drive node lists all files in the configured folder.
- Build Title Pages JSON — A Code node creates an Autype Render JSON config with one page section per document. Each title page shows the document name, creation date, last modified date, owner, and document number.
- Render Title Pages PDF — Autype renders all title pages as a single multi-page PDF in one API call (one page per document).
- Upload Title Pages PDF — The rendered PDF is uploaded to Autype Document Tools for page extraction in the loop.
- Prepare Loop Items — A Code node creates one item per document with the Drive file ID, title page number, and the title pages file ID.
- Loop Over Documents — For each document:
- Download PDF from Drive — Downloads the file binary from Google Drive.
- Upload Document to Autype — Uploads the document to get a file ID.
- Extract Title Page — Uses the Keep/Remove Pages operation to extract the matching page from the title pages PDF (page 1 for doc 1, page 2 for doc 2, etc.). Returns
outputFileIddirectly. - Collect Merge Pair — Stores
outputFileIdfrom Extract Title Page and the document file ID as a pair for the final merge.
- Build Final Merge List — A Code node interleaves all pairs into one comma-separated file ID string.
- Merge All PDFs — Combines all files into a single PDF in order. Returns
outputFileId. - Add Company Watermark — Uses
outputFileIdfrom Merge directly (no re-upload). Stamps the company name in blue (#2563EB) on every page at 60% opacity. - Save Final PDF to Drive — Uploads the watermarked result as
merged-documents-YYYY-MM-DD.pdfto the configured Google Drive folder.
Setup
- Install the Autype community node (
n8n-nodes-autype) via Settings → Community Nodes. - Create an Autype API credential with your API key from app.autype.com. See API Keys in Settings.
- Create a Google Drive OAuth2 credential and connect your Google account.
- Import this workflow and select your Autype credential in all Autype nodes and your Google Drive credential in all Google Drive nodes.
- Set
YOUR_FOLDER_IDin the "List PDFs in Folder" node to the ID from your folder URL (https://drive.google.com/drive/folders/YOUR_FOLDER_ID). - Set
YOUR_FOLDER_IDin the "Save Final PDF to Drive" node to the same folder ID (or a different output folder). - Change the watermark text in the "Add Company Watermark" node to your company name.
- Click Test Workflow to run the pipeline.
Note: This is a community node. You need a self-hosted n8n instance to use community nodes.
Requirements
- Self-hosted n8n instance (community nodes are not available on n8n Cloud)
- Autype account with API key (free tier available)
n8n-nodes-autypecommunity node installed- Google Drive account with OAuth2 credentials
How to customize
- Change title page content: Edit the "Build Title Pages JSON" Code node to add or remove metadata fields, change font sizes, or adjust colors.
- Change watermark text: Replace "Your Company Name" in the "Add Company Watermark" node with your actual company name, "CONFIDENTIAL", "DRAFT", or any other label.
- Adjust watermark style: Change
color,fontSize,opacity, orrotationin the watermark options. Setpagesto a range (e.g. "2-") to skip title pages. - Use a different output folder: Change the folder ID in the "Save Final PDF to Drive" node to upload to a separate location.
- Add compression: Insert a Compress operation between the watermark and the Drive upload to reduce file size.
- Add password protection: Insert a Protect operation after watermarking to encrypt the final PDF (see the A06 workflow for an example).
- Control document order: Add sorting logic in the "Build Title Pages JSON" Code node to define the order in the merged PDF.